What is Internet Security and Acceleration (ISA) Server 2006?
ISA server is a complete network and
security management application for today’s IT infrastructure. ISA
server acts as a gateway that eliminates the threats from Internet to
your network environment. ISA also provides fast and secure access to
applications and data. With new features such as Array policy, rules,
policy based administration, firewall, VPN support, client deployment
etc, ISA provide a large significance to information security
professional, network and system administrator and overall to the total
IT infrastructure.
Why to use ISA 2006?
Provides a protection against internal
and external Internet threats coming to your network. ISA acts as a
gateway and blocks the threats like malware, harmful web sites and
files.
With ISA, we can now securely access
remote applications, data, documents etc. Web based applications,
exchange, sharepoint applications access are now possible for both
internal and external corporate networks to access securely.
With limited usage of bandwidth, securely connect to your branch offices.
ISA 2006 Editions:
ISA 2006 comes in two flavors, ISA Server
2006 Standard Edition and ISA Server 2006 Enterprise Edition.
Enterprise Edition has all the full functionality of ISA server
available, whereas Standard edition has some of the features are not
available or are limited to certain extent such as Windows Network Load
Balancing (NLB) Support is not available and some of the policy features
are limited to local server and not to whole AD structure.
Components of ISA Server 2006
Configuration Storage server: stores all
the configuration information of the arrays in the network using a
mechanism called Active Directory Application Mode (ADAM).
ISA Server service: ISA server service
could be installed on same computer along with other ISA components or
can be installed to other computer. ISA server service runs the virtual
private network (VPN), caching information and firewall.
Array: if more than one ISA server 2006
enterprise edition is running on the network then it is called Array.
Each Array is connected physically and shares the same configuration.
ISA Server Management: This is the user
interface or the Microsoft Management Console (MMC) for administrator to
manage ISA server.
Installation of ISA Server 2006 on Windows Server 2003
ISA server is not part of the Windows
components and we can’t install it from Server Manager either by adding a
new roles or new features. ISA Server needs to be downloaded from
Microsoft site to install and configure or can be installed via other
methods such as ISA Server CD/DVD etc.
We will use the trail 180 days Enterprise
Edition of ISA Server with SP1 for installation and will install all
the components in a single server.
Note: We can also install ISA on two
separate computers, Configuration Storage Server on first computer and
ISA Server services on second computer.
#1. Run the
ISA2006SP1-ENU-EE-EVAL.exe (if you are installing a trail version) or
ISAAutorun.exe (if you are installing the licensed version). Installer
will then run and extract the setup files for installation.
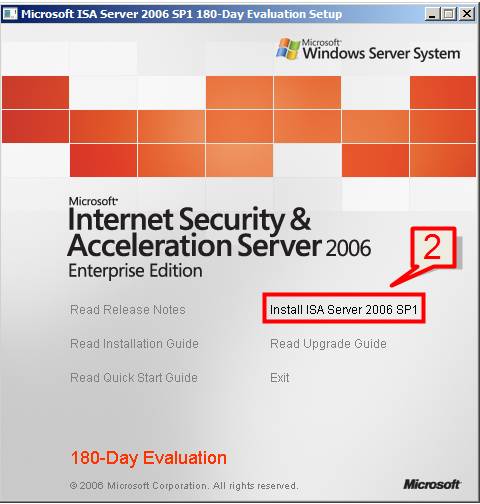
#2. Select Install ISA Server 2006 SP1 on the installation dialog.
#3. The installation wizard will provide a setup installation sequence dialog.
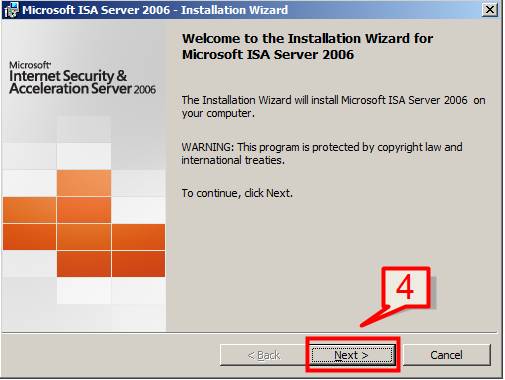
#4. On the welcome installation wizard click next.
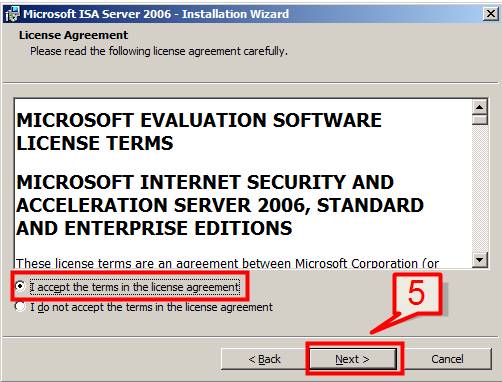
#5. Click on I accept the terms of the license agreement and click next.
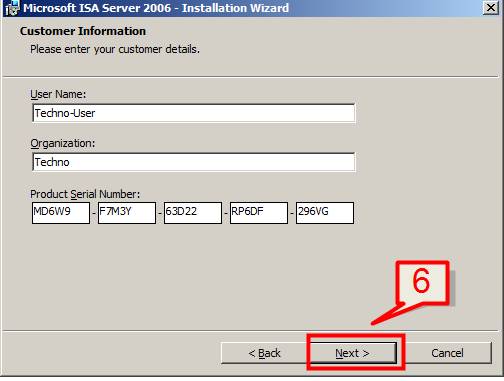
#6. Provide user name, organization and product serial number information and select next.
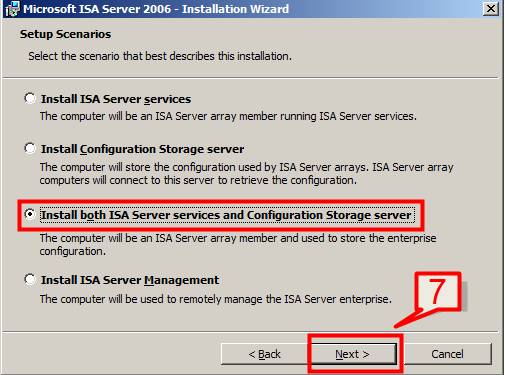
#7. Choose the third option Install both ISA Server services and Configuration Storage server and click next.
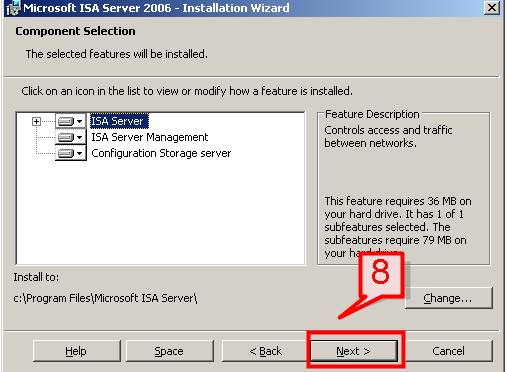
#8. Select the default configuration and click next.
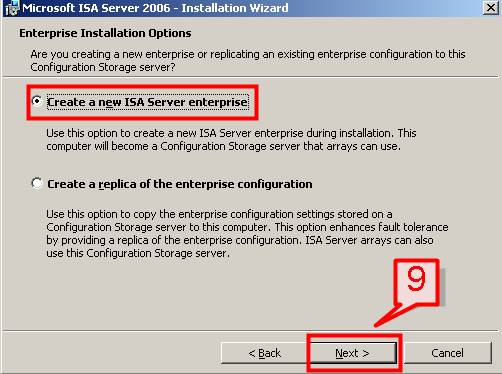
#9. Since we are creating a new ISA server enterprise, select create a new ISA server enterprise and click next.
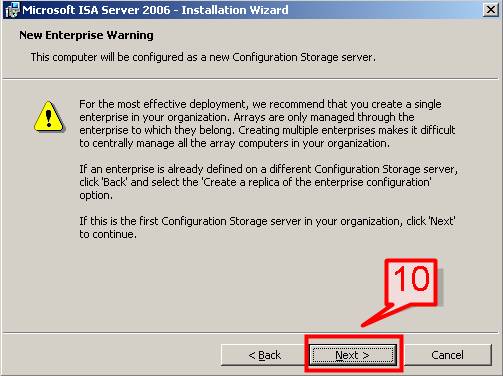
#10. A warning will appear that this computer will be configured as Configuration Storage manager, click next.
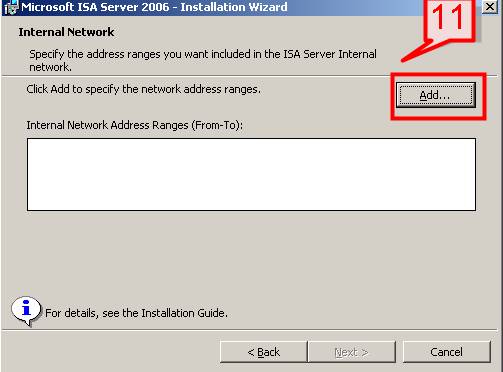
#11. On the Internal Network page, click on Add.
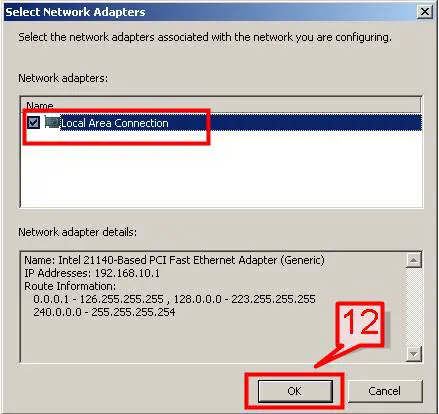
#12. Click on Add Adapter, select the Adapter that are connected to the network and click OK.
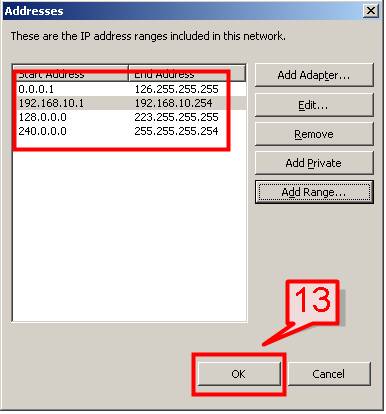
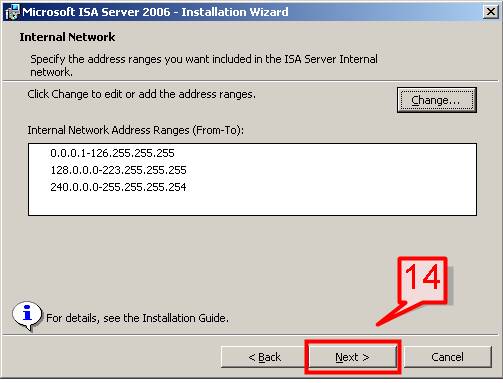
#13. On the IP Address page provide the IP address range and Click OK.
#14. Netowrk address range will now display on the Internal Network page, click Next.
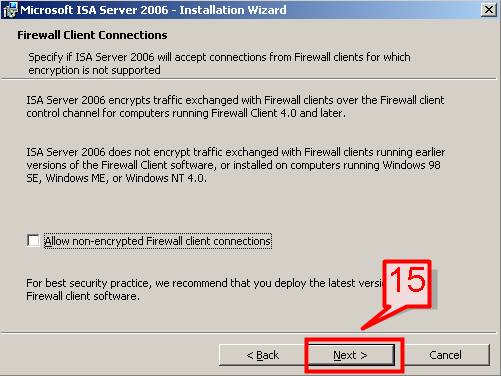
#15. Leave the default setting and click on Next on next screen.
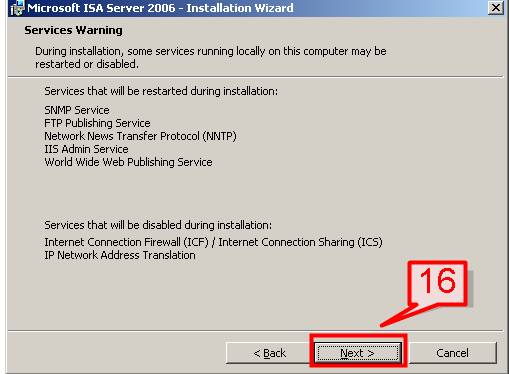
#16. Click next on the service warning page.
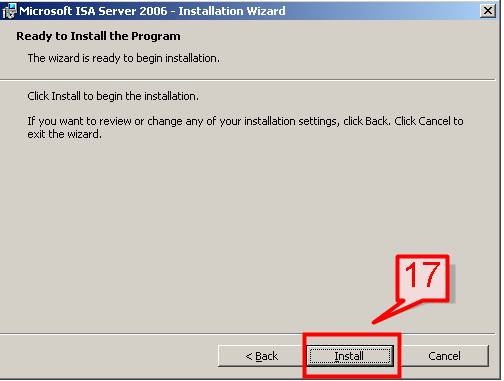
#17. Click Install on the installation wizard dialog to start installation.
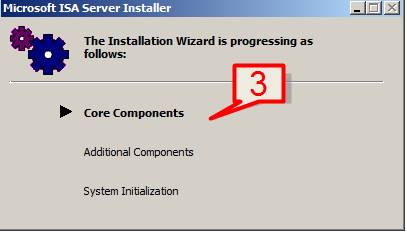
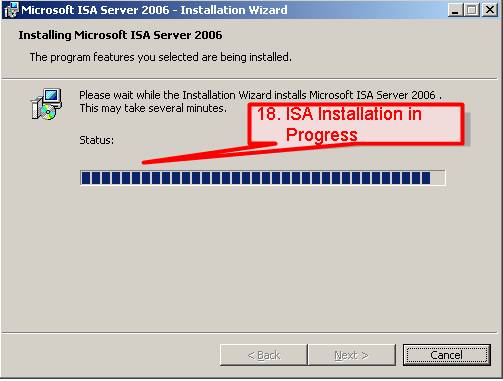
#18. Installation will
then start installing Core Components, Additional Components and System
Initialization. The whole process will take some time to complete. Click
Finish once done.
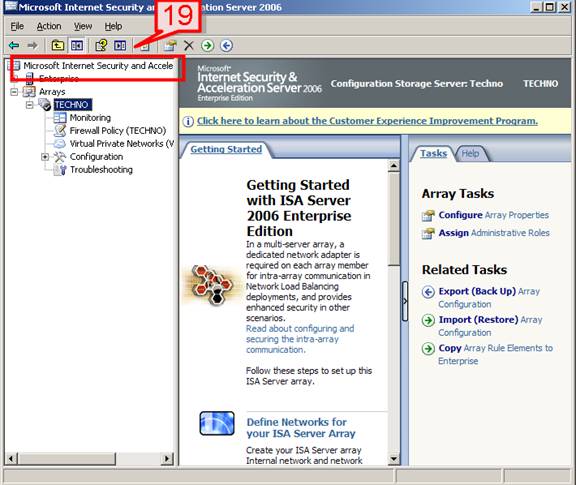
Configure ISA Server
#19. Open Start->Program->Microsoft ISA Server->ISA Server Management.
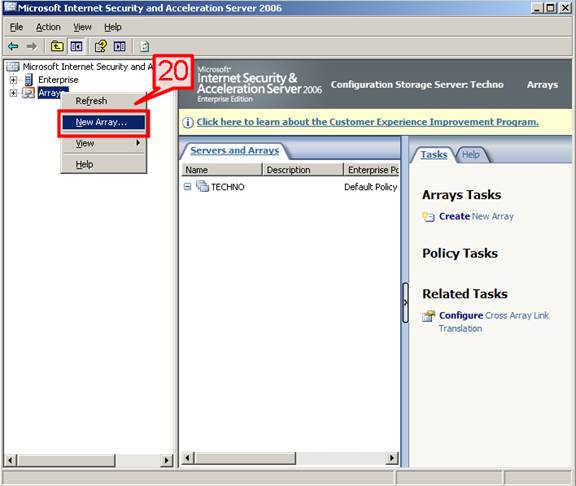
Create a New Array
#20. Select Array right click and select New Array.
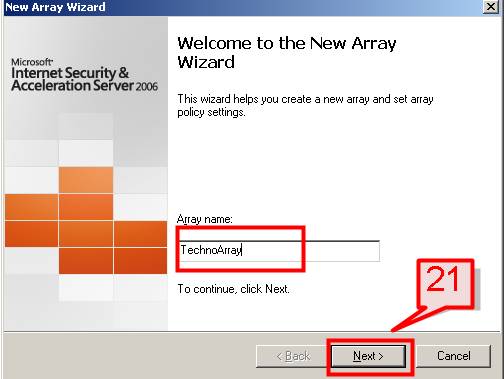
#21. On the New Array wizard type an Array name and click next.
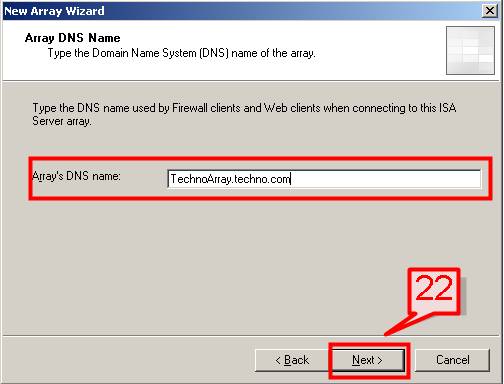
#22. Type Array’s DNS name and click next.
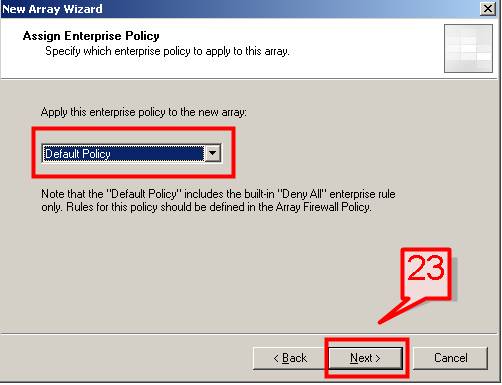
#23. Since this is a new server, choose Default Policy and click next.
#24. Leave the default and click next.

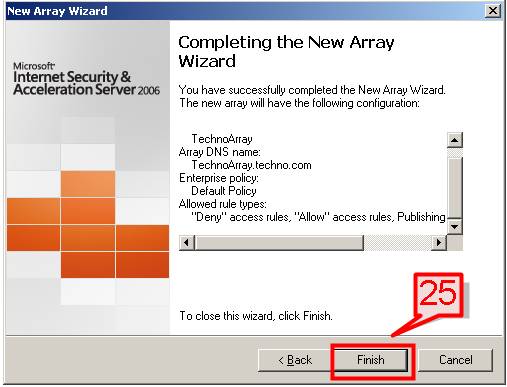
#25. Review your customizations changes and click finish.
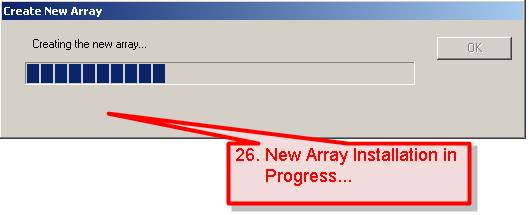
#26. New Array installation will then start, Once done click OK.
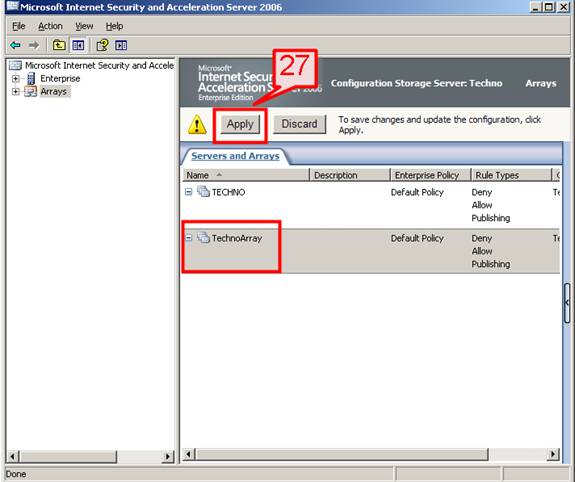
#27. New Array that we created will now appear under Array section. Click Apply to update the changes.
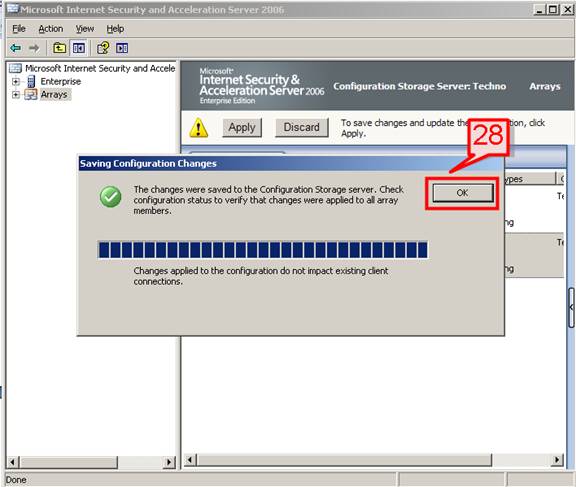
#28. Configuration changes will now save click OK once done.
Configure Networks
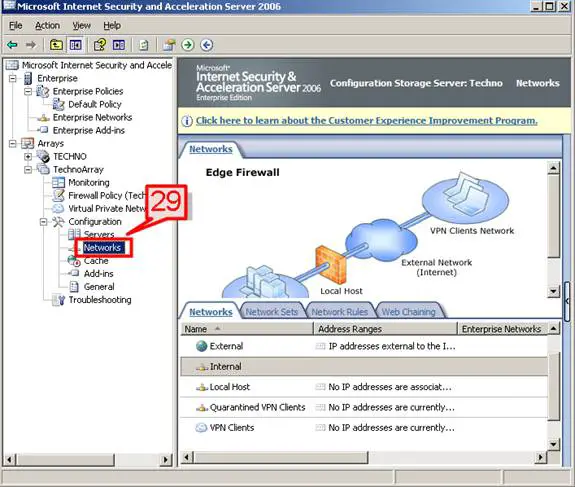
#29. On the New Array that was just created, Expand configuration and select Networks.
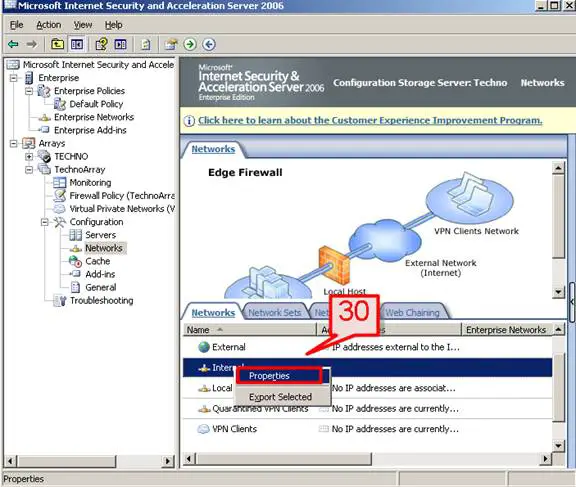
#30. On the middle network page select internal->right click->select property.
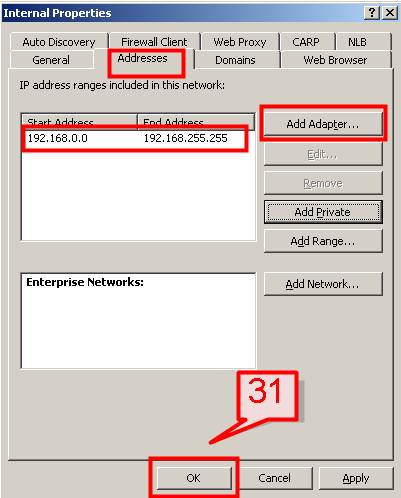
#31. Select Addresses
tab, click on Add Adapter->Select a Network->Add an IP address
range to this Array (same way as we created during installation).
Once done click OK.
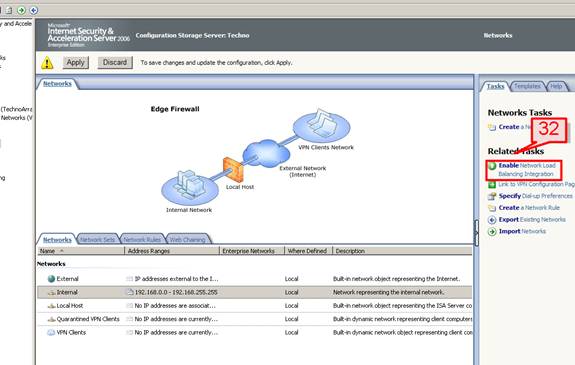
#32. On the task section select Enable Network Load balancing integration.
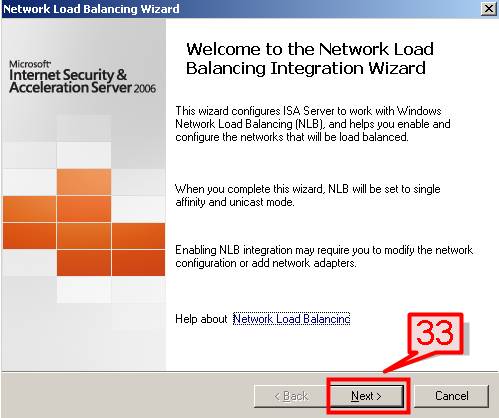
#33. Click next on the Network Load balancing integration wizard.
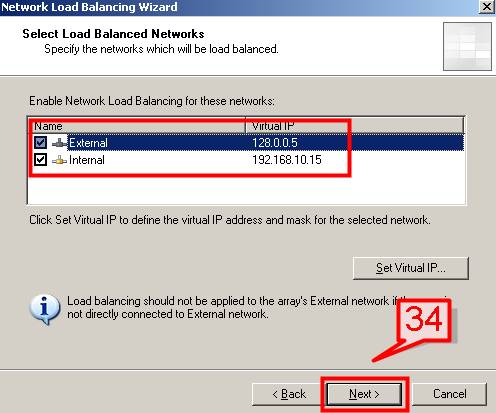
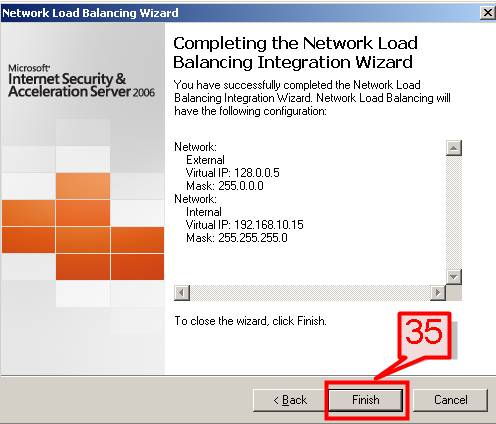
#34. Set a Virtual IP
for both External and Internal networks (by clicking on Set Virtual IP
and providing an IP address) and click next.
#35. Click finish to complete the Network Load balancing integration wizard.
Repeat the same procedure for the other Networks that are defined on the Array.
#36. Enable the firewall for the network interface that we created.
Select the Internal network->right click->select property->Select the Firewall client.
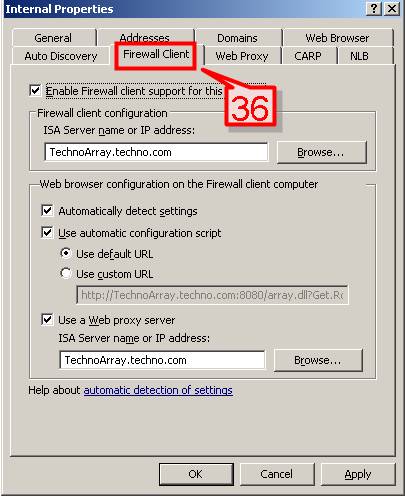
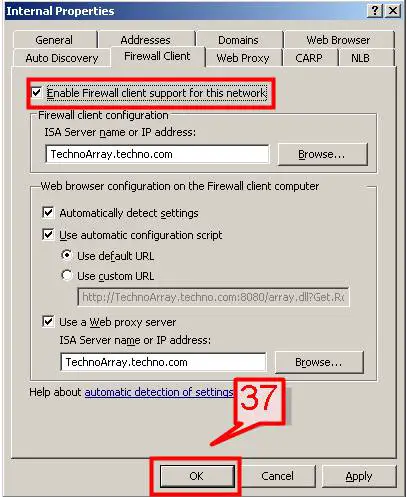
#37. Select Enable Firewall client support for this network and click ok.
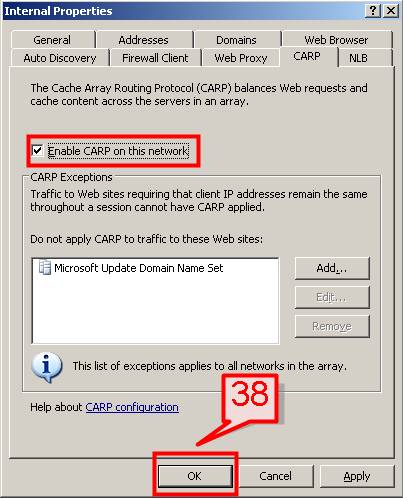
#38. Same way we can also select Cache Array Routing Protocol (CARP).
Select the Internal network->right
click->select property->Select CARP->Select Enable CARP on this
network and click OK.
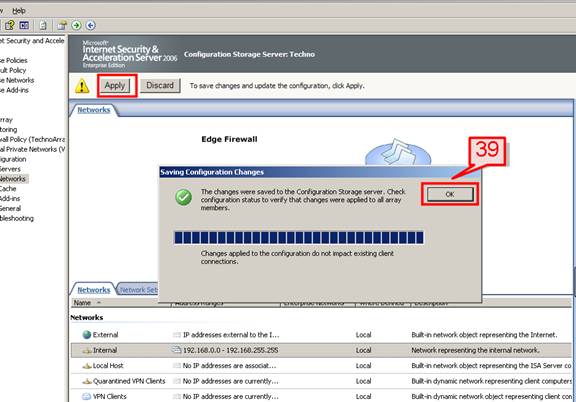
#39. Once the configuration are done, select Apply to save the changes and click ok once done.
As a Dell employee, I think your blog on ISA server is quite impressive and useful. It can act as a guide for configuring the server. Thank you for sharing such a useful information.
ReplyDelete