Scenario:
In
this scenario an organization is running Exchange 2003 in co-existence
with Exchange 2007. We have to completely remove Exchange 2003 without
affecting any services and major downtime.
Uninstalling Exchange 2003
There are a number of operations that must be performed in a sequence to accomplish this task.
Who can perform the Un-installation Operations?
A user performing exchange operations must be member of following groups
- Domain Administrators
- Enterprise Administrators
What are the Downtime Requirements?
There
are no specific downtime requirements for the organization however some
users might face downtime while their mail box is being moved from
Exchange 2003 to Exchange 2007
Un-Installation Pre-Requisites
- An organization administrator must decide for the un-installation procedure only when there are
- Adequate amount of resources are available
- Recent backups of data and system state are available
There must be a well trained and equipped team to handle data recovery tasks in case of any disaster (hardware failure etc)
Migration of User Mailboxes from Exchange 2003 to Exchange 2007
In
order to migrate from Exchange 2003 to Exchange 2007 it is basic
requirement that all users must be moved to the newer version i.e.
Exchange 2007.
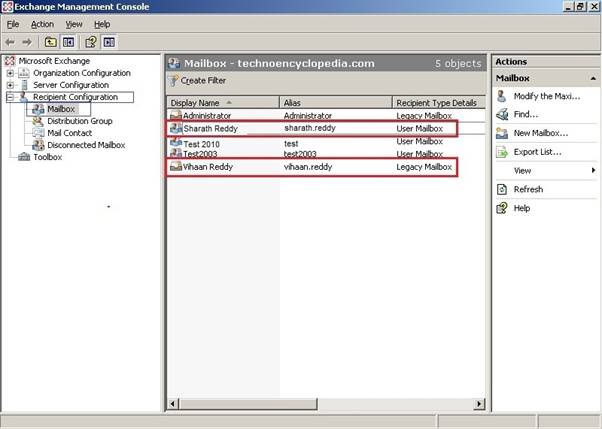
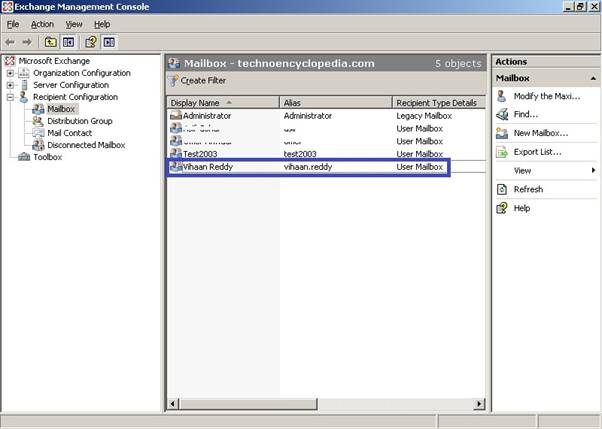
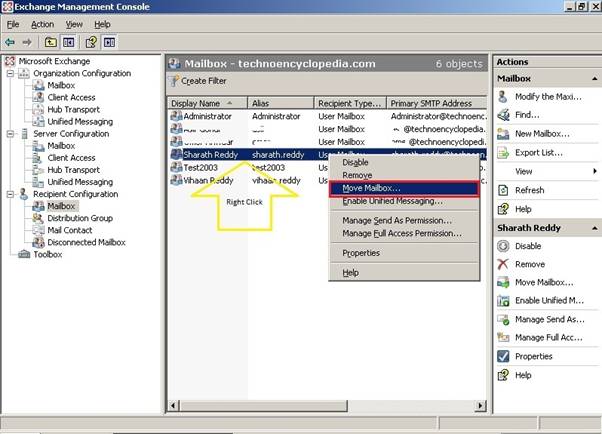
You
can check through Management console of Exchange 2007 which user
mailboxes still reside on exchange 2003 server. As shown in Figure. 1,
all users on exchange server 2003 have a grayed icon before “Display Name” and in the “Recipient Type Details” column mailbox is mentioned as “Legacy Mailbox”
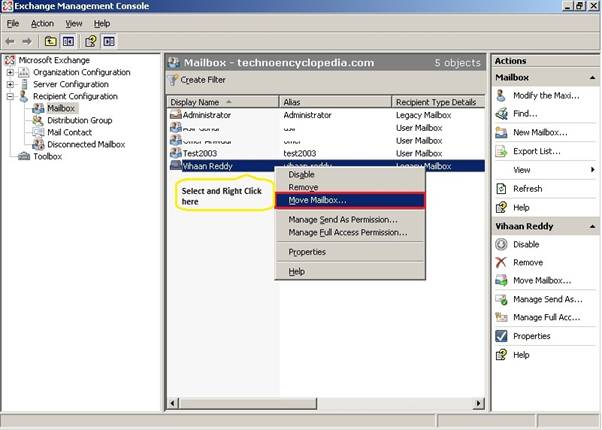
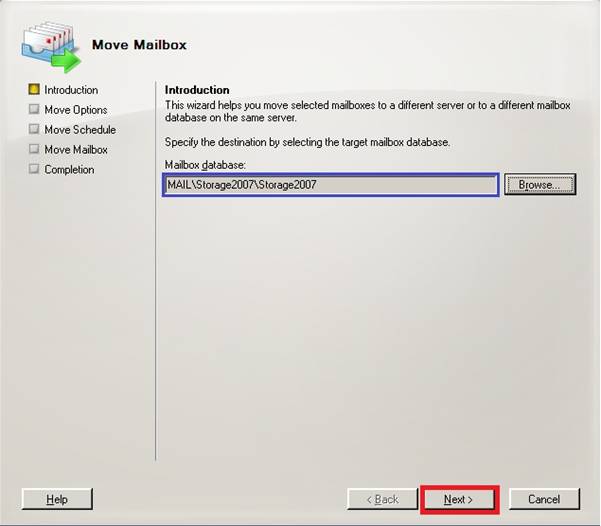
In order to move a mailbox from Exchange 2003 database to Exchange 2007, right click on that account and select “Move Mailbox”
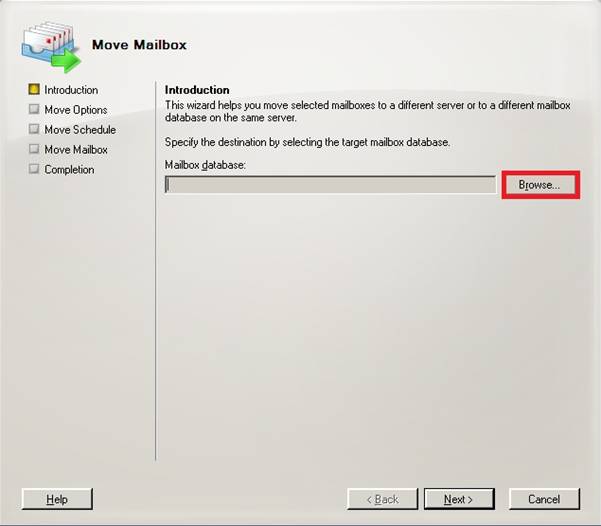
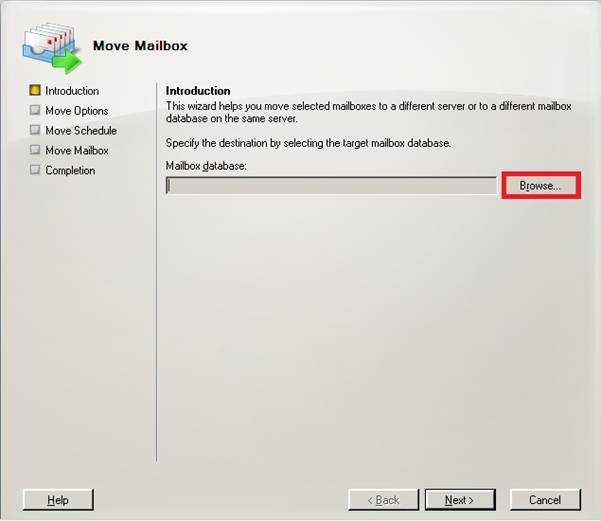
In the Move Mailbox windows click on “Browse”
A new dialog box will open up giving you some choices between different storage groups and their locations.
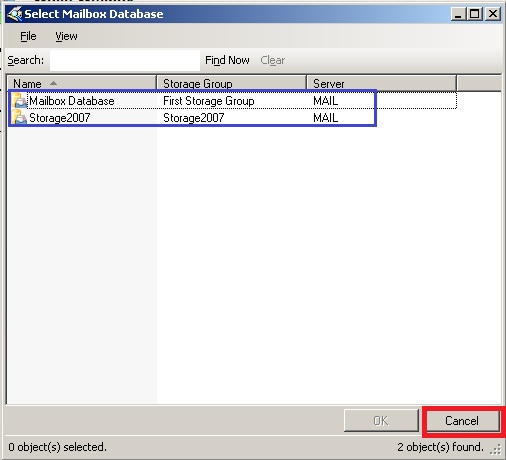
Select the storage group which belongs to Exchange 2007
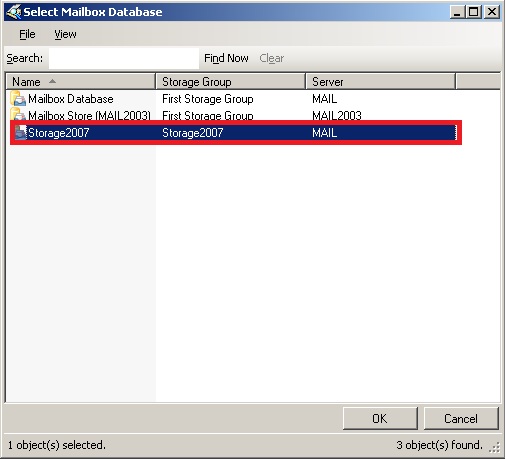
After selecting the appropriate mailbox, click “Ok” to proceed
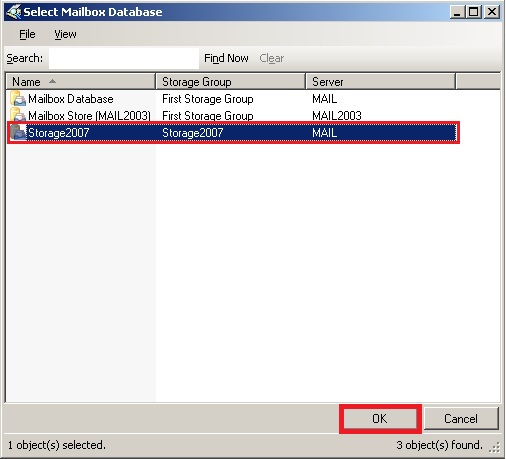
Before moving on, make sure you have selected a storage group that belongs to Exchange 2007 server.
Click “Next”
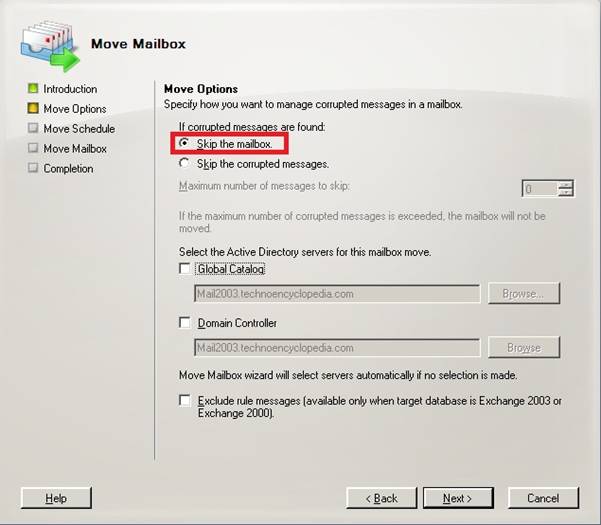
In
the new windows a number of options will be there. It is always better
to skip whole mailbox in case of corrupted messages are found. It saves
you from the pain of single mail recovery if some data loss occurs due
to connectivity issues during migration of mailboxes
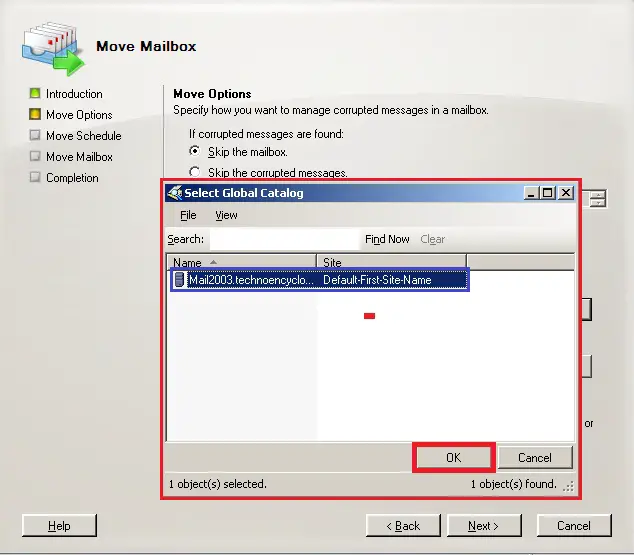
Select desired Global Catalog Server by clicking on the browse button
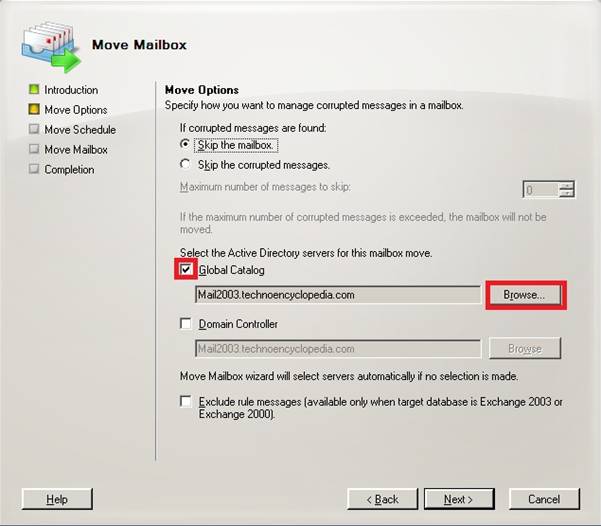
After a selection is complete, click “OK” to proceed
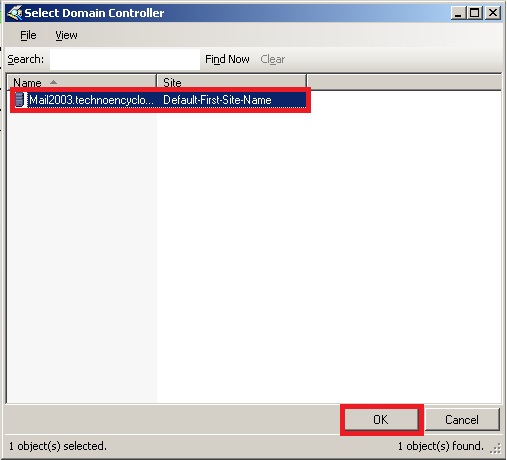
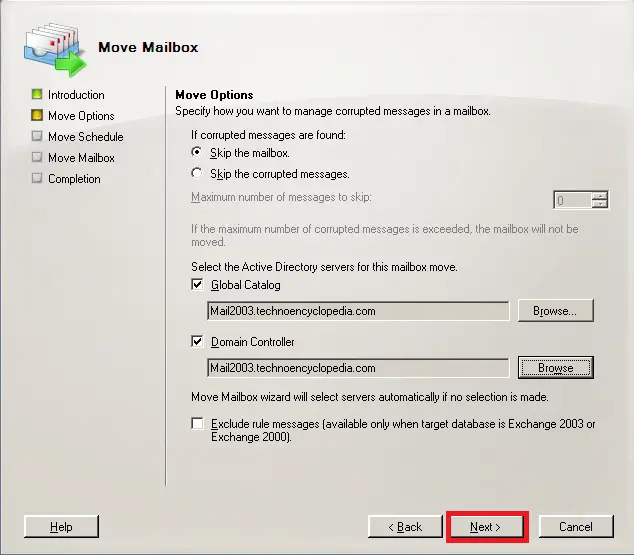
Now check “Domain Controller” box and click browse button
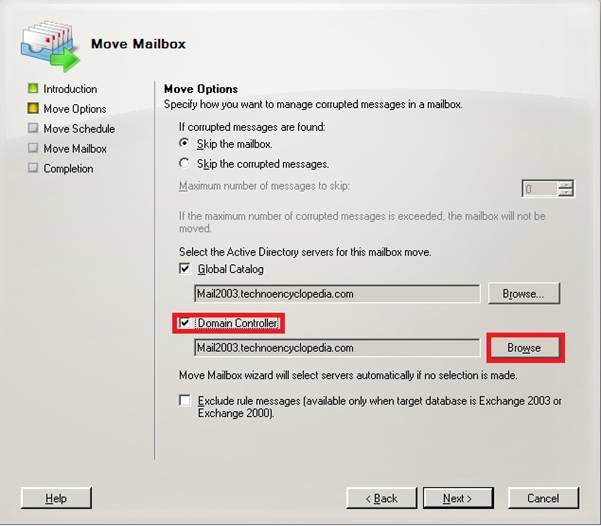
Select domain controller and click “OK”
After all configuration options are selected, click “Next”
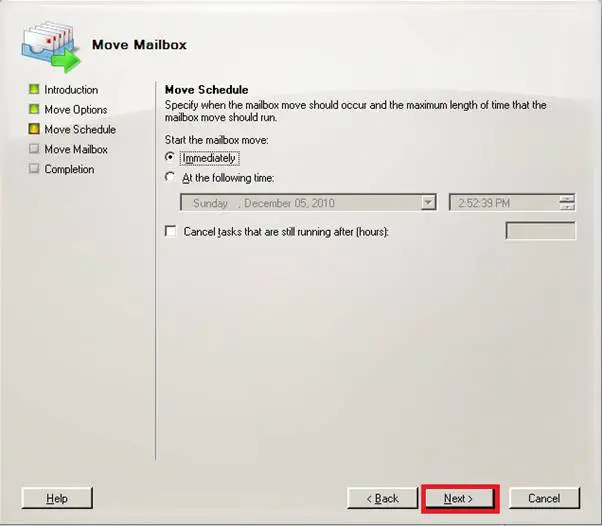
In
the new windows, exchange migration utility will ask for scheduling of
migration activity. You can always schedule this activity for off peak
hours when users are not accessing their emails. This will save you
support queries and will not affect users as well.
To start migration immediately, the appropriate radio button can be selected.
Click “Next” to proceed
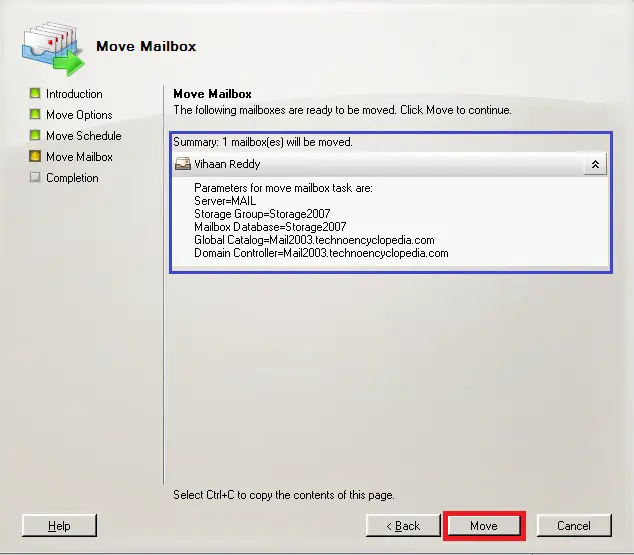
Next
screen will show a brief summary of the action that will be performed
and ask for confirmation. Now you must ensure that all parameters and
selections are correct.
Click “Move” to start mailbox migration
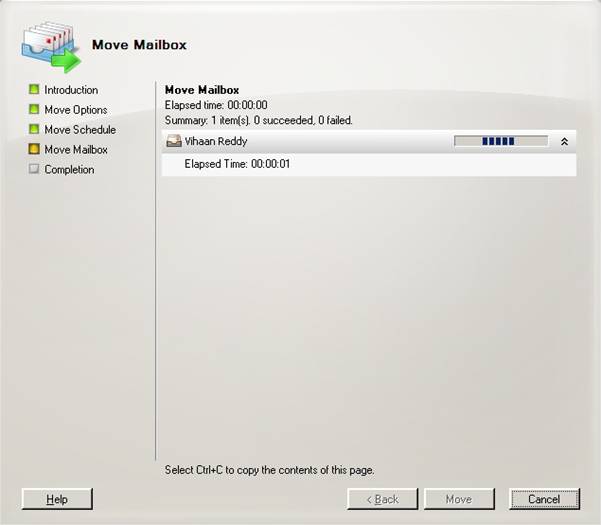
Migration process can take up to several minutes depending on the size of mailbox.
Once you get a completion message click “Finish”
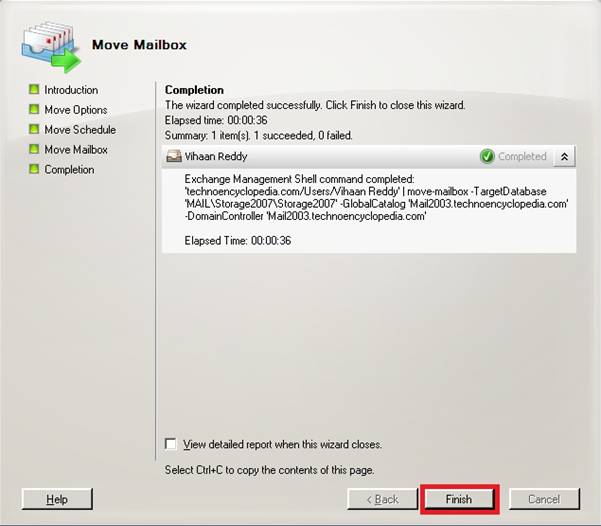
Once migration is finished you will notice that gray colored icon and legacy exchange status marks have been removed as well.
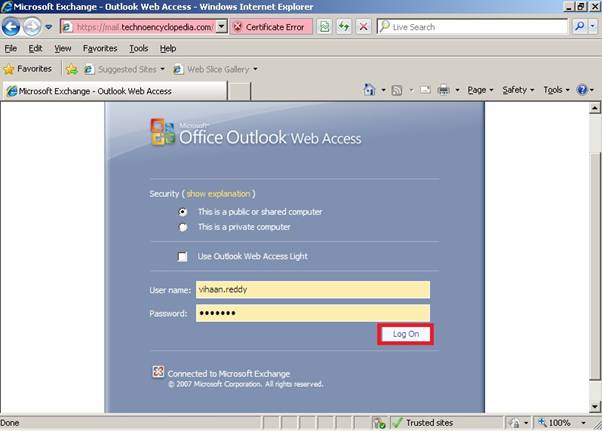
Now the account can be accessed through Outlook Web Access setup on CAS server.
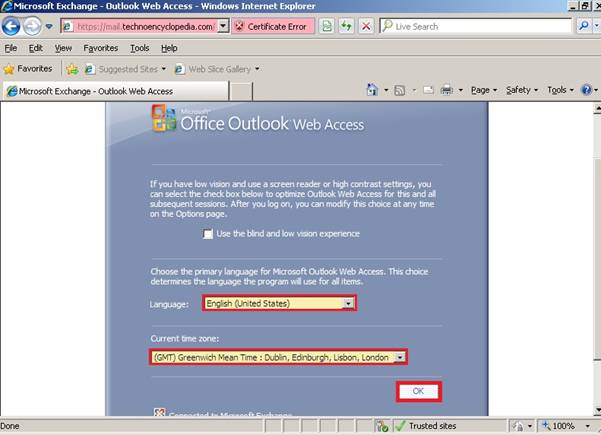
For the first time it should ask for language settings and time zone, since it is a new account on Exchange 2007.
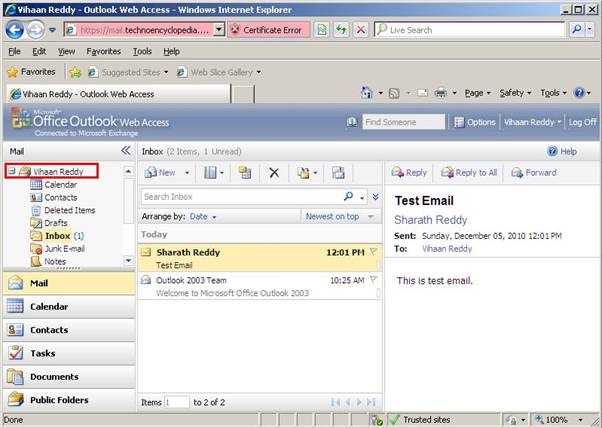
You will experience rich interface of Outlook Web Access if you are using IE6.5 or later.
Setting up SMTP Connectors for Exchange 2007
Exchange
Server 2007 comes with separate roles although most of these can be
installed on same server machine. “Send Connector” is responsible for
delivery of emails and must be configured before we un-install Exchange
2003.
To perform this operation, go to the server where Exchange Server 2007 is installed. Follow this path to open up EMC
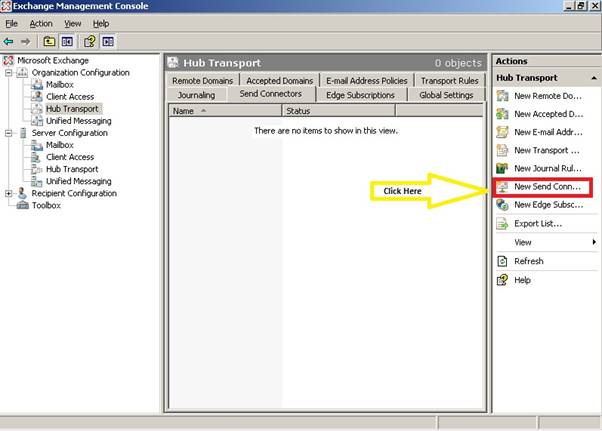
Start > All Programs>Microsoft Exchange Server 2007 >Exchange Management Console Click onHub Transport under theOrganization Configuration tab
From the Action Pane onyour right click “New Send Connector”
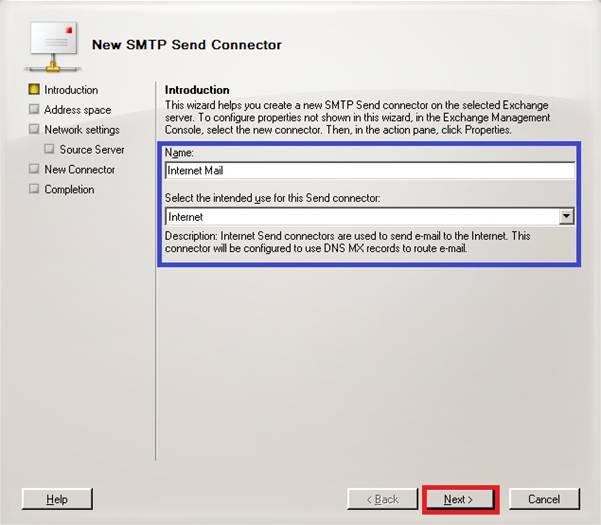
Provide a descriptive name to new connector and select “Internet” from second scroll down menu. Now click “Next”
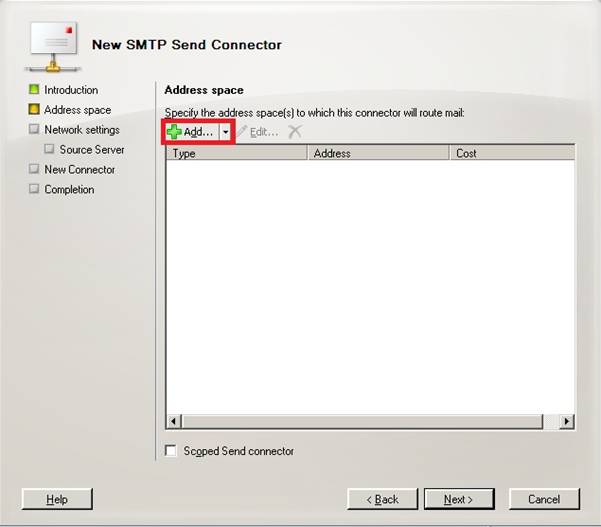
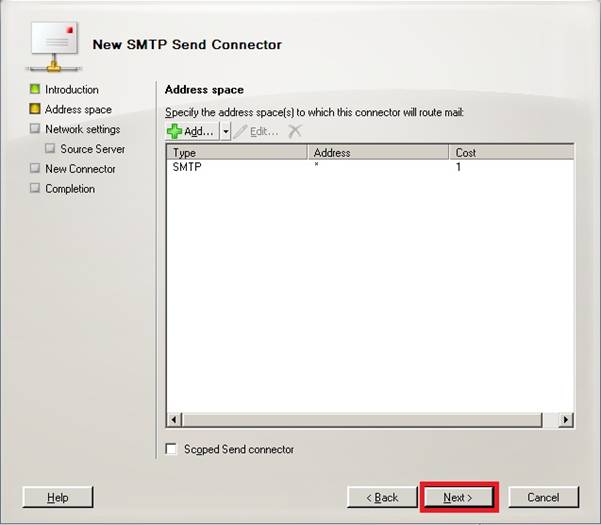
Click “Add” for more configurations
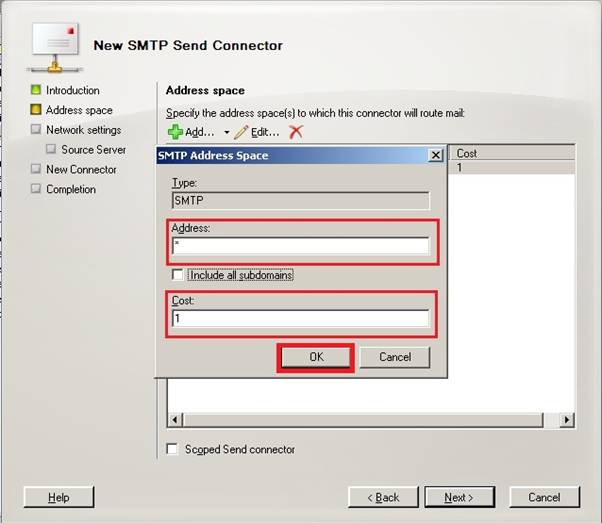
Provide the values as mentioned in the figure and make sure to keep lowest value of “Cost”. This will ensure top priority of this server while email delivery.
Click “Next”
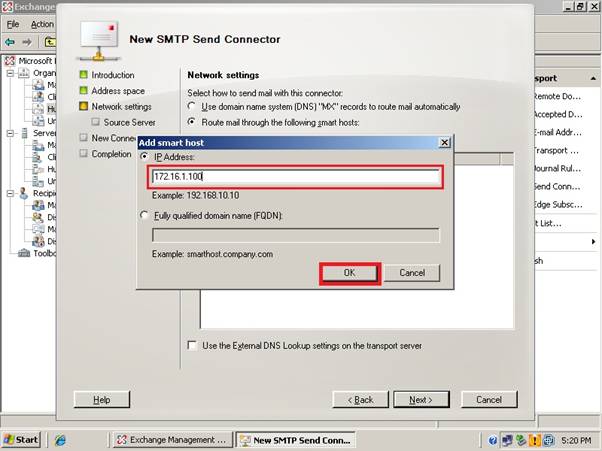
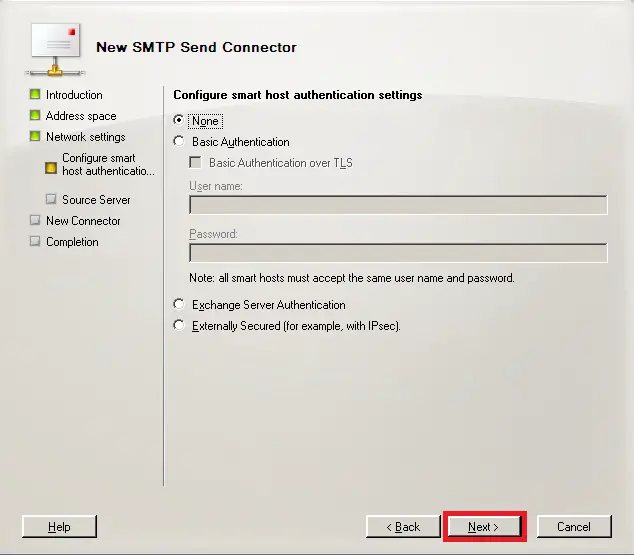
Click“Add” in order to provide theSmart Host Entry
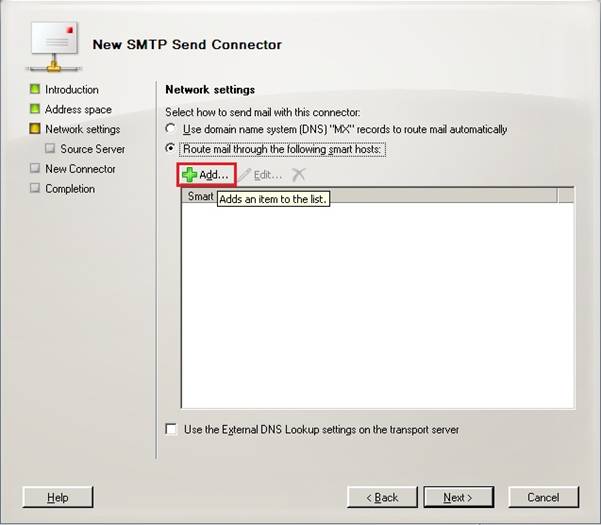
Provide IP Address of server you wish to use as “Smart Host” and click “Ok”
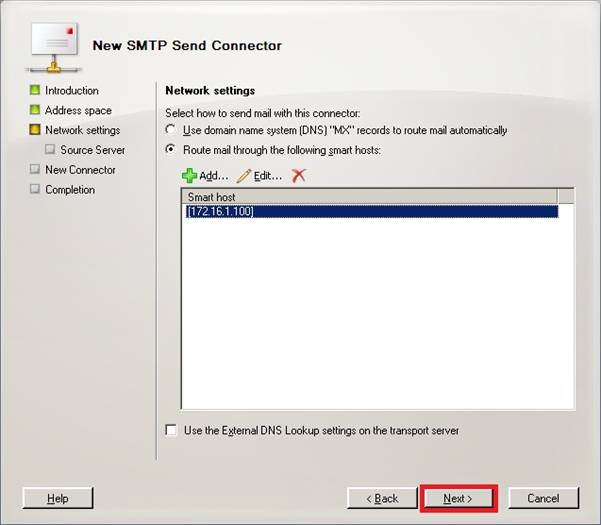
Click “Next” to proceed
Keep authentication settings as default and click “Next”
You will observe a summary screen
Click “Next”

New connector summary screen will appear now
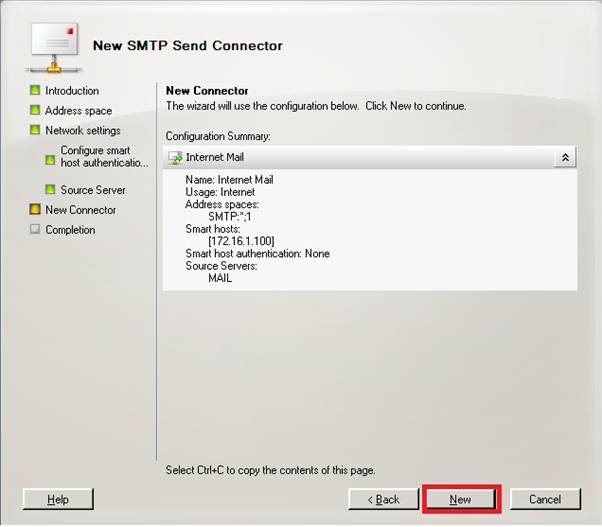
Once the creation is finished successfully, click “Finish”
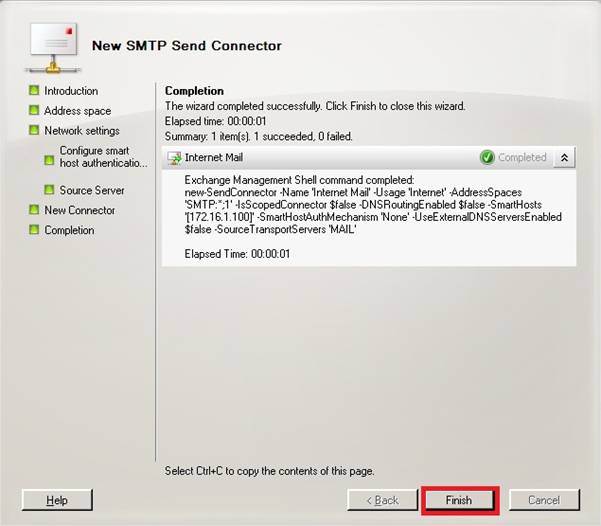
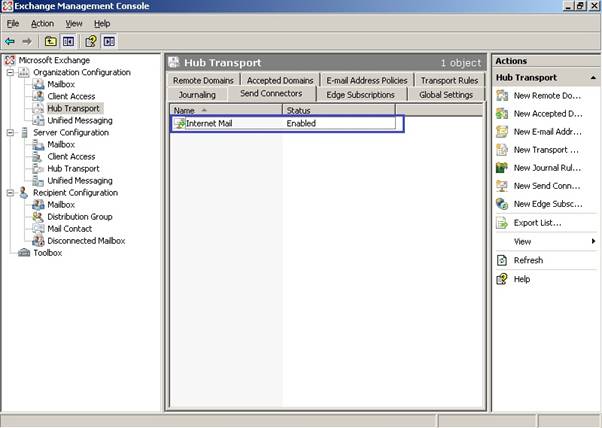
Now you can see that in the Management Console you have a new entry for send connector
Receive Connector Configuration
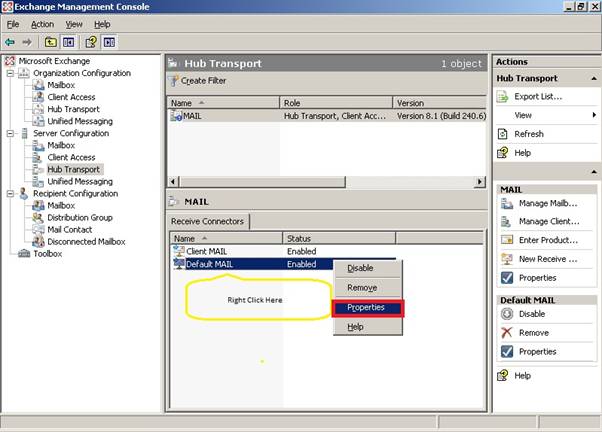
While remaining in the Exchange Management Console of Exchange 2007, single click onHub Transport underServer Configuration
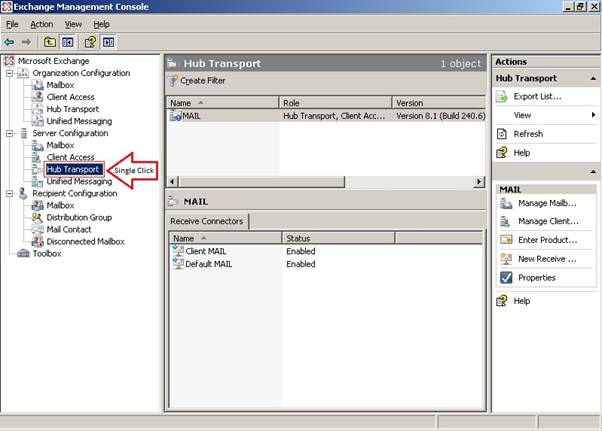
In the middle pane, select a receive connector by right click and go to Properties
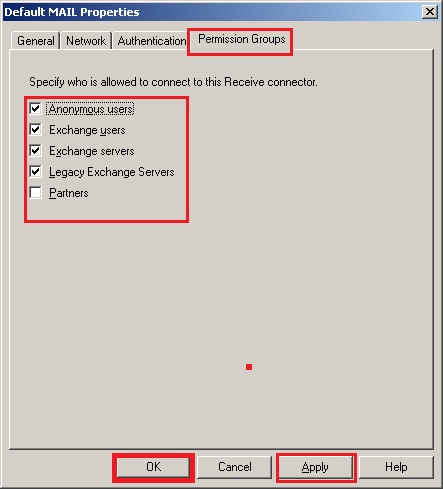
SelectPermission Group tab and allow anonymous users to connect to this receive connector
Un-Installation Steps on Exchange 2003 Server
Now
that we have done all necessary configurations on Exchange Server 2007
and all services are functional, a few steps need to be performed on
Exchange 2003 Console.
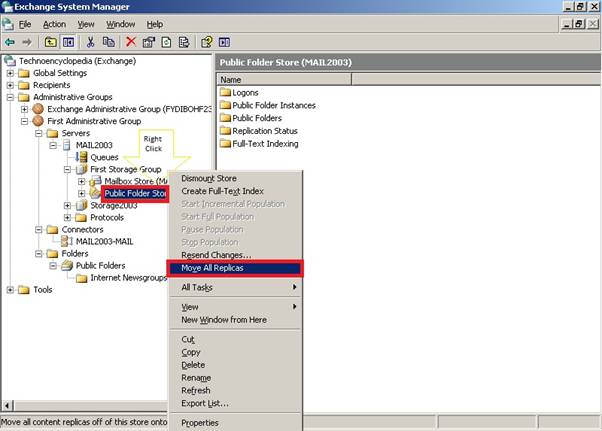
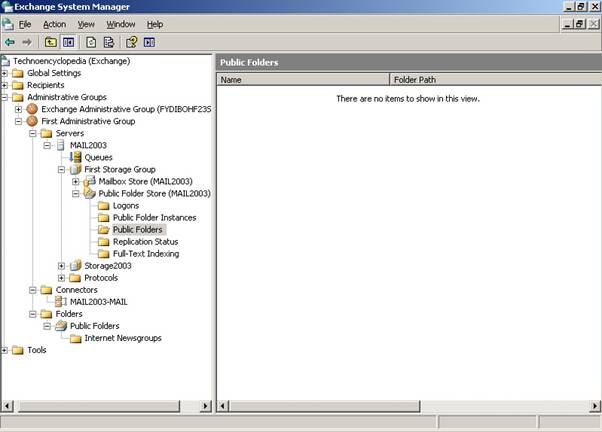
Moving Public Folder Databases
Locate “Public Folder Store” under “Exchange Administrative Group”
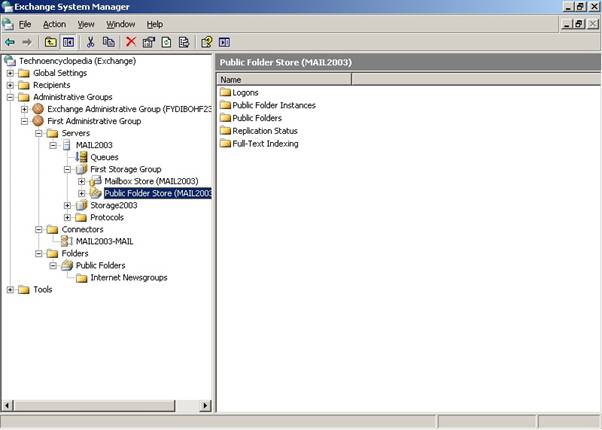
Right click the Public Folder Store and click “Move All Replicas”
A window will pop up to let you select the server where these replicas will be moved to.
Select from the list only Exchange 2007 server and click “Ok”
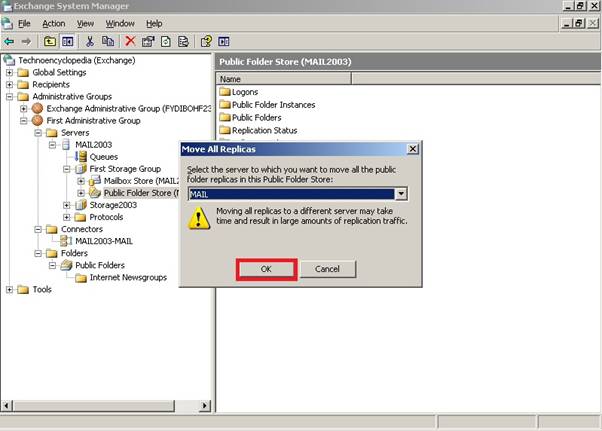
A warning message will appear. Read carefully and click “Ok” to proceed.
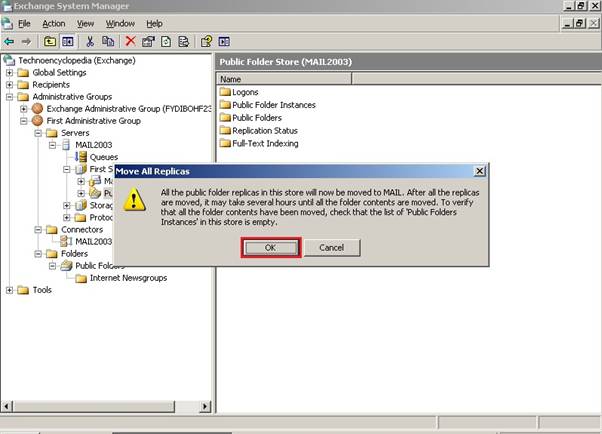
The processes make take some time depending upon the size of data.
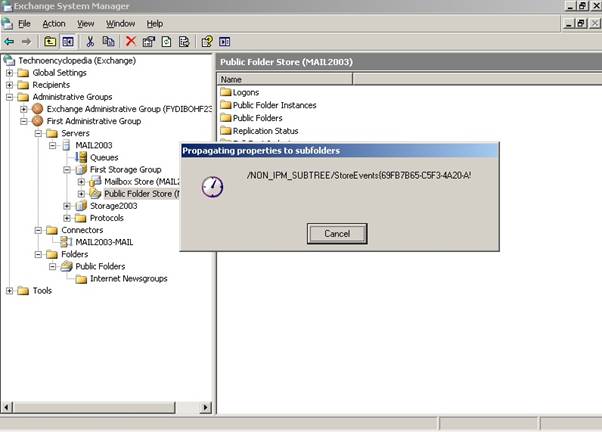
Once all folders are moved you will observe empty middle pane.
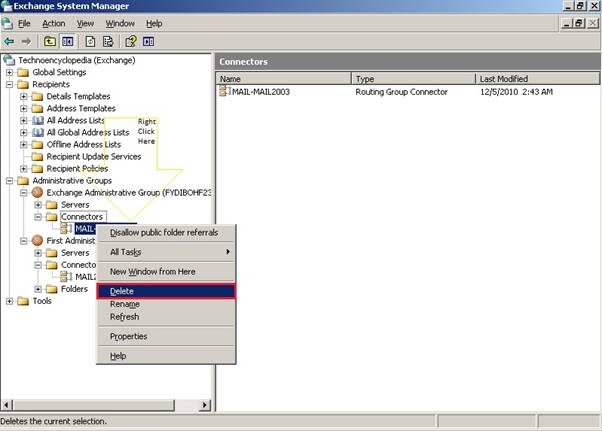
Removing Routing Group Connectors
Removing routing group connectors is important to uninstall the exchange 2003.
In the “Administrative Groups” select “Connectors”
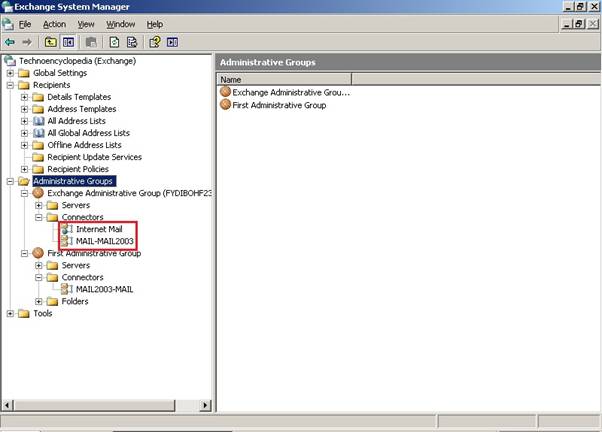
Right click on the connectors and click “Delete” one by one
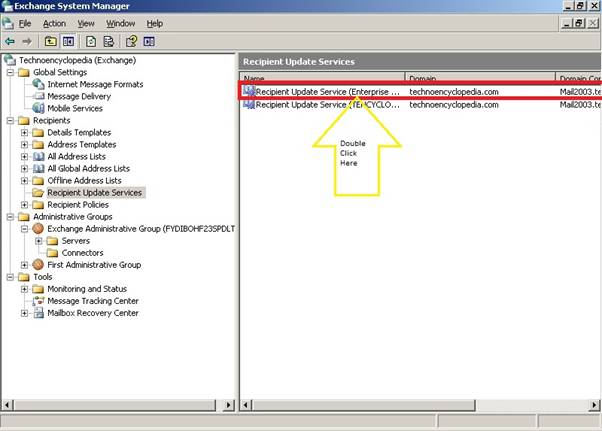
Altering Recipient Update Services
In order to change setting for recipient update services go to Management Console and selectRecipient Update Services underRecipients folder
Double click on a service to select from the middle pane
You will notice that under the “Exchange Server” parameter a value is set that points to Exchange 2003 based email server.
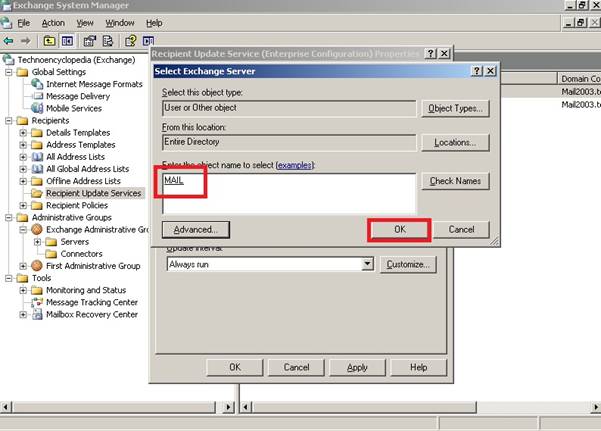
In order to change this setting click on “Browse”
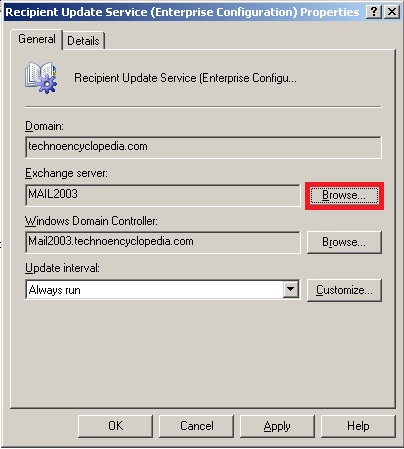
Look for and select Exchange 2007 server which is “MAIL” in our scenario.
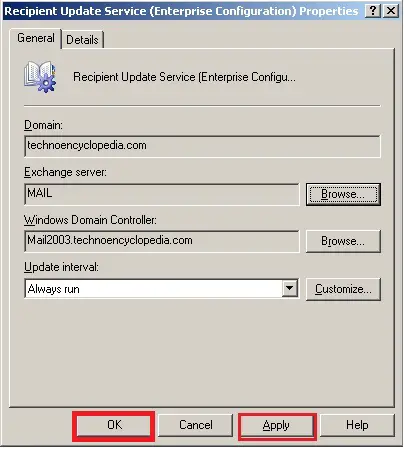
Click “Apply” and then click “Ok”
Now that we have finished all pre requisites we can now safely go for the un-installation activity.
Un-Installation Setup
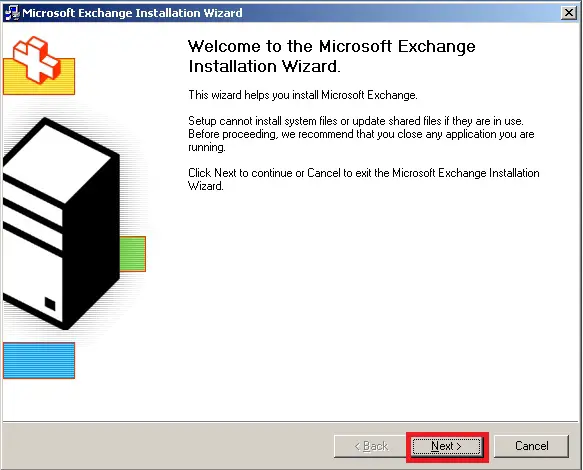
From
the Exchange 2003 installation setup source, select setup.exe file.
This file is generally located at this patch SETUP/I386/setup.exe.
A wizard will guide you how to proceed.
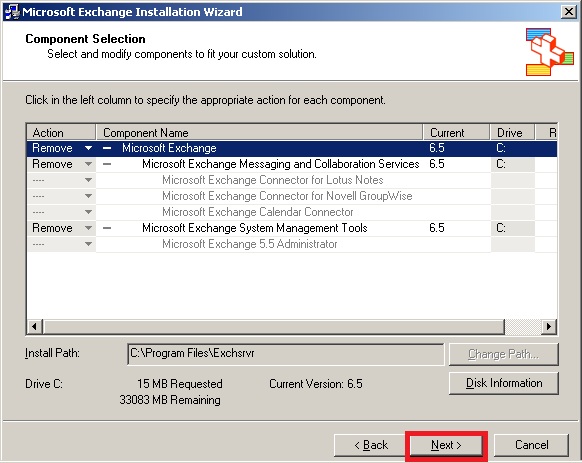
From the Action list select “Remove” for all items
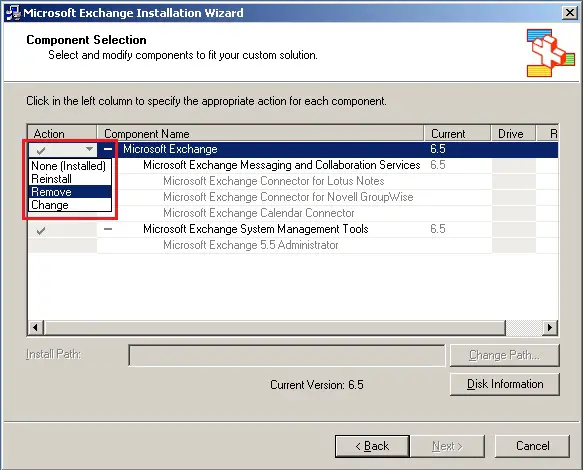
Click Next once selection is done
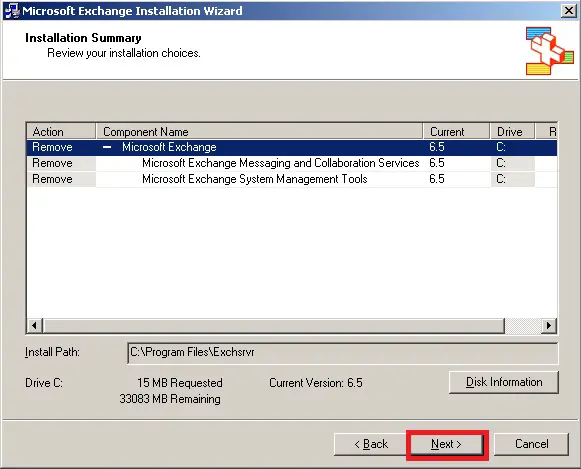
Installation summary screen will appear.
Click “Next”
Un-installation will take some time to complete.
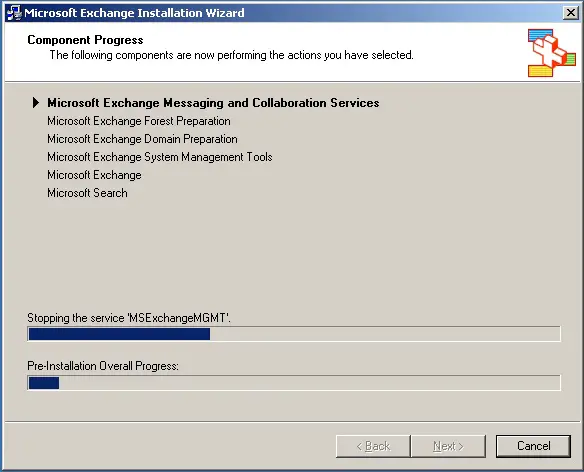
Once you receive a confirmation message of Un-Install, click “Finish” to exit the wizard.
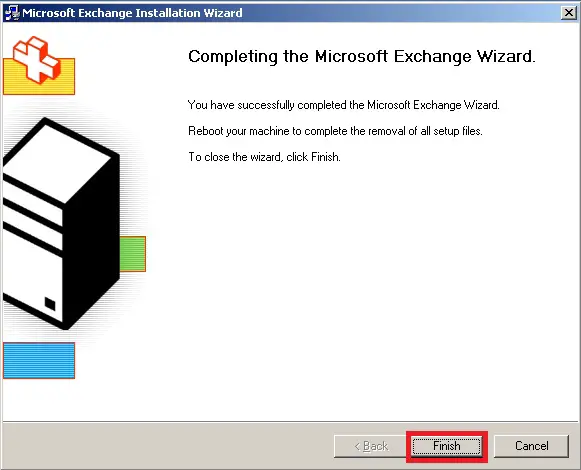
Exchange 2003 has now been un-installed from your organization and only Exchange 2007 is running now.
Verification of Exchange 2003 Removal
In
order to verify proper function of Exchange 2007 you can exchange
emails to and from different accounts within your organization as well
as to other domains.
Within server console you can check this fact throughExchange Management Console
Go toMailbox underRecipient Configuration
You will notice that no account is with Legacy mailbox
You can further re-confirm by right clicking an account and go to“Move Mailbox”
Click “Browse”
In the popup screen you will notice that no Exchange 2003 based server is available.
Now you now click cancel to exit the console
Conclusion
Exchange
2003 has been successfully decommissioned from the co-existence
environment. Now all user mailboxes and public folders reside on
Exchange 2007 based emailing system.
No comments:
Post a Comment